Asma QuickStart guide: Setup a HPC with AWS

High-Performance Computing (HPC) has become an increasingly important tool for solving complex scientific and engineering problems and can help accelerate research and innovation. However, setting up an HPC cluster can be a challenging and time-consuming task, requiring specialized hardware and expertise in system administration. Fortunately, cloud computing services like Amazon Web Services (AWS) offer a convenient and cost-effective alternative, enabling you to quickly and easily spin up a cluster of compute nodes with just a few clicks. In this post, I will guide you through the process of creating an HPC cluster on AWS, showing you how to use AWS services like EC2, S3, and EFS to build a scalable and flexible computing environment that meets your needs. Whether you’re a researcher, engineer, or data scientist, this post will help you get started with using AWS to solve your HPC problems.
Important points to remember:
1- No matter what approach you will use to create a cluster with AWS, you will directly or indirectly be using AWS CloudFormation.
2- CloudFormation in itself is free but it will create other AWS services such as EC2 instance which will charge you per use.
3-Always delete everything once you are done with the service.
4- Most importantly, pay attention to which region you are creating your services in. Services such as SSH key, a cluster,…etc should be in the same region.
5- Before creating any service, check if the region and zone you selected are supporting the type of services you want such as EC2 instance type.
Head Node vs Computer Node:
In an HPC cluster, the head node acts as the central control point for managing and coordinating the work performed by the compute nodes, which are optimized for running computational workloads. The head node handles job scheduling, user authentication, and access, while the compute nodes run parallel jobs and communicate with the head node. The head node and compute nodes work together to provide a scalable and efficient computing environment.
SLURM
Later on, when we will build the cluster, we will add a tool to be set-up with the cluster, this tool is called Slurm.
SLURM (Simple Linux Utility for Resource Management) is an open-source job scheduler and resource manager for large-scale cluster systems. It provides a comprehensive set of tools to manage and allocate resources, such as computing nodes, memory, and I/O bandwidth, among other resources, to multiple users and workloads in a cluster environment.
The simplest example I can think of is the cluster = your Airbnb apartment that you listed and SLURM is your Airbnb guests! You will build your apartment /renovate it once and listed to be rented by strangers to use it for some period of time.
AWS ParallelCluster CLI vs AWS ParallelCluster Manager:
As with any service in AWS, there are multiple approaches depending on your skill level and how much time you want to invest. To create a cluster in AWS you can do that by CLI or GUI.
- CLI tool is AWS ParallelCluster CLI.
- GUI tool is AWS ParallelCluster Manager.
AWS ParallelCluster is a tool that makes it easy to set up and manage HPC clusters on the AWS cloud. There are two main components of AWS ParallelCluster: the AWS ParallelCluster CLI and the AWS ParallelCluster Manager. The AWS ParallelCluster CLI is a command line interface that allows you to launch and manage HPC clusters directly from your terminal. It provides a simple and easy-to-use interface for controlling various aspects of your cluster, such as launching instances, setting up networking, and configuring storage. On the other hand, the AWS ParallelCluster Manager is a web-based graphical user interface that provides a more intuitive and interactive way to manage your HPC clusters. It offers a visual representation of your cluster resources and provides a convenient way to perform common cluster management tasks, such as adding or removing nodes, monitoring cluster usage, and managing storage. Both the AWS ParallelCluster CLI and Manager are useful tools for creating and managing HPC clusters on AWS, and the choice of which one to use will depend on your individual needs and preferences.
In this post, I’ll demonstrate the CLI option, if you want to learn more about the GUI you can refer to this link here.
In a few words, to use the GUI, you will have to install the GUI using AWS CloudFormation and from it, you can set up the cluster setting.
AWS ParallelCluster CLI:
Personally, I prefer to use the command line method. To use CLI, We have 2 options, either we can use the command line from our local computer or use AWS Cloud9, the fastest method is to use AWS cloud9 which we will be using in this tutorial.
Note: you still can follow this tutorial with the same instructions but from your local machine, but first you have to install AWS CLI and setup it up locally, to do so follow the below tutorial.
AWS Cloud9:
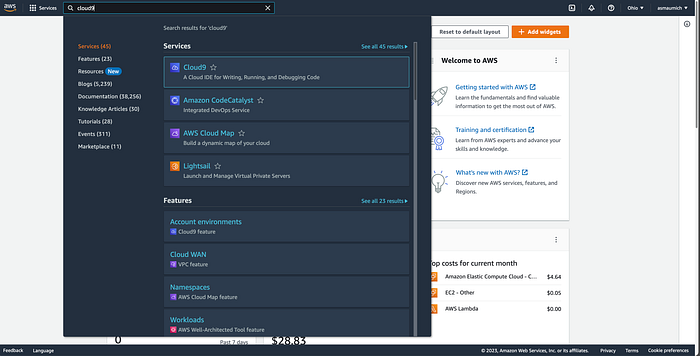
Log in to AWS, change region to Ohio us-east-2, and search cloud9 in the search bar
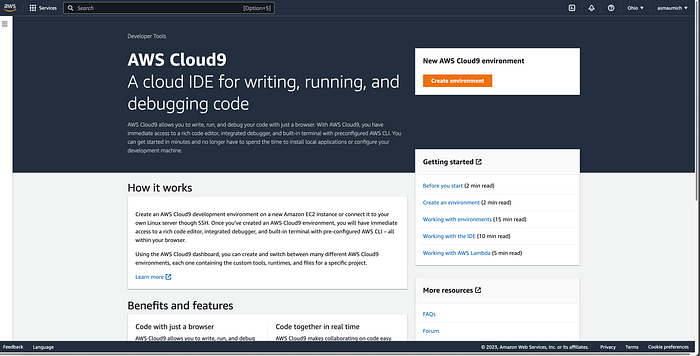
Click on Create environment button
Write any name you want for the cloud9 environment, and scroll down to the Timeout option, change it from 30 min to 1 day, the rest keep the default values. Click on create button


It will take several minutes to build.

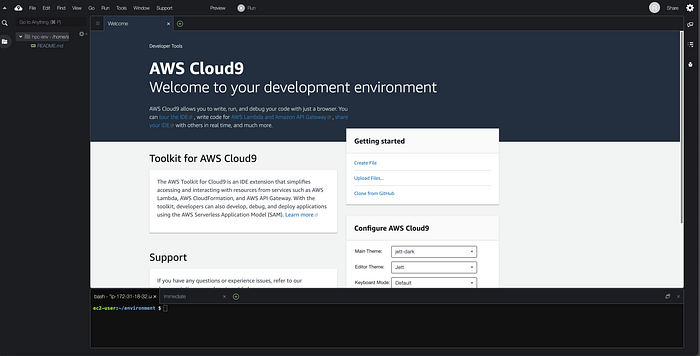
Click on the open link to open the IDE, now you have IDE on the cloud preconfigured with AWS CLI! The left panel is your file tree, the middle section is tap/taps, and the below section is your terminal with Bash.
To check AWS CLI version, you can run the below command in the terminal
aws --version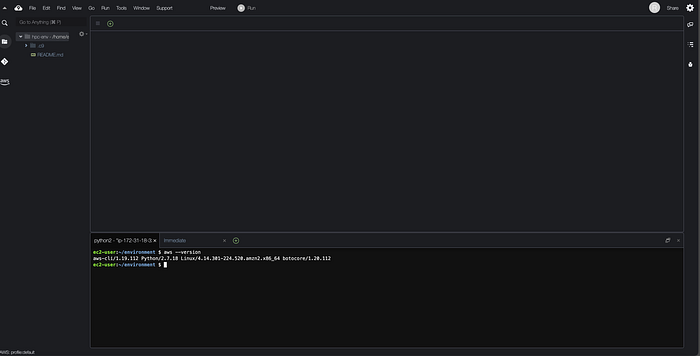
Create SSH key:
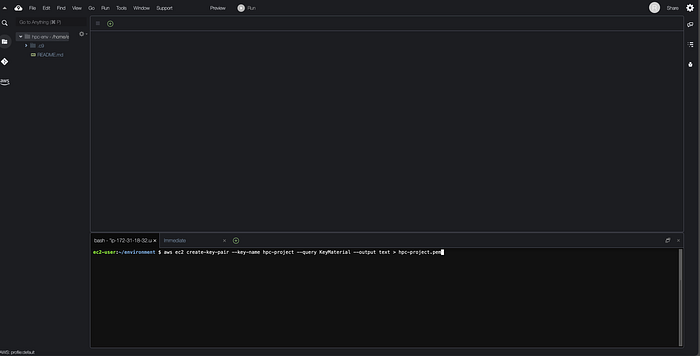
In AWS, you need to generate an ssh key before creating an ec2 instance or cluster, because, at the moment of creating them, AWS will ask you how you want to connect it. Again, with almost anything in AWS, you can create an SSH key either through GUI or CLI, we will use the latter by simply running the following command in the cloud9 terminal
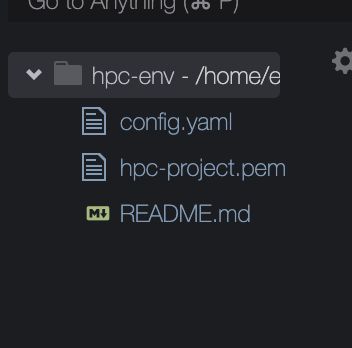
aws ec2 create-key-pair --key-name hpc-project --query KeyMaterial --output text > hpc-project.pemHere, you can name your SSH key any name you like, in my case I named it ‘hpc-project’
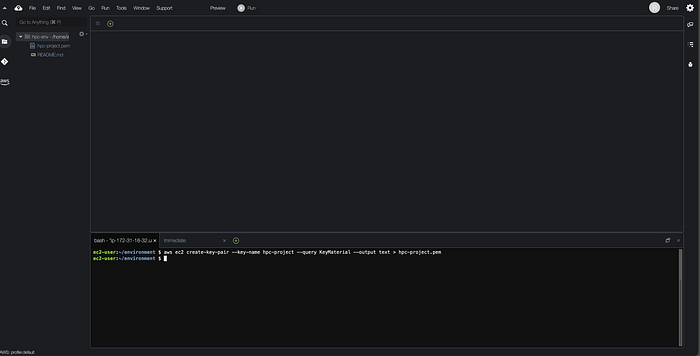
it will create a pem file
then run this command
chmod 600 hpc-project.pemAfter that, add your file reference to .basher
echo "export AWS_KEYPAIR=hpc-project" >> ~/.bashrc
source ~/.bashrc
To check your keys, run the following command
aws ec2 describe-key-pairsAWS ParallelCluster:
In the Cloud9 terminal, run this command to install AWS ParallelCluster
pip3 install "aws-parallelcluster" --upgrade --user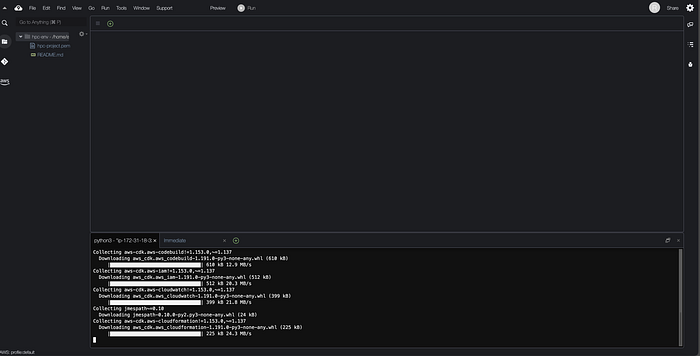
to create a cluster, first, we need a cluster config file. You can create it using the interactive command line or create a config file directly. Both of them will generate a cluster configuration file that when you build it will create a CloudFormation stack.
Cluster specifications -> Cluster config file -> Build- config file> Cluster is ready
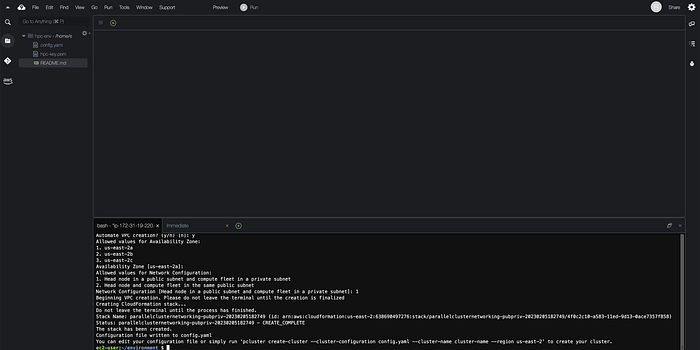
METHOD 1: the interactive method:
run this command in the cloud9 terminal and answer prompt questions
pcluster configure --config config.yaml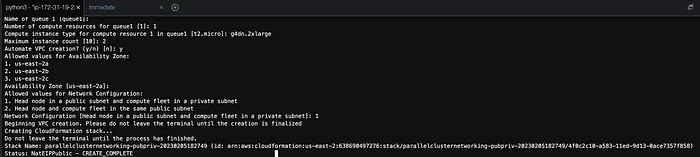
METHOD 2: Create config file:
run the following command in the cloud9 terminal, to get subnet and region values.
IFACE=$(curl --silent http://169.254.169.254/latest/meta-data/network/interfaces/macs/)
SUBNET_ID=$(curl --silent http://169.254.169.254/latest/meta-data/network/interfaces/macs/${IFACE}/subnet-id)
VPC_ID=$(curl --silent http://169.254.169.254/latest/meta-data/network/interfaces/macs/${IFACE}/vpc-id)
REGION=$(curl --silent http://169.254.169.254/latest/meta-data/placement/availability-zone | sed 's/[a-z]$//')
then change YOUR_KEY_NAME in the below script before running it in cluoud9 terminal
cat > config.yaml << EOF
Region: ${REGION}
Image:
  Os: alinux2
SharedStorage:
  - MountDir: /shared
    Name: default-ebs
    StorageType: Ebs
HeadNode:
  InstanceType: c5.xlarge
  Networking:
    SubnetId: ${SUBNET_ID}
    ElasticIp: false
  Ssh:
    KeyName: YOUR_KEY_NAME
Scheduling:
  Scheduler: slurm
  SlurmQueues:
    - Name: compute
      CapacityType: ONDEMAND
      ComputeResources:
        - Name: compute
          InstanceType: c5.xlarge
          MinCount: 0
          MaxCount: 8
          DisableSimultaneousMultithreading: true
      Networking:
        SubnetIds:
          - ${SUBNET_ID}
        PlacementGroup:
          Enabled: true
EOF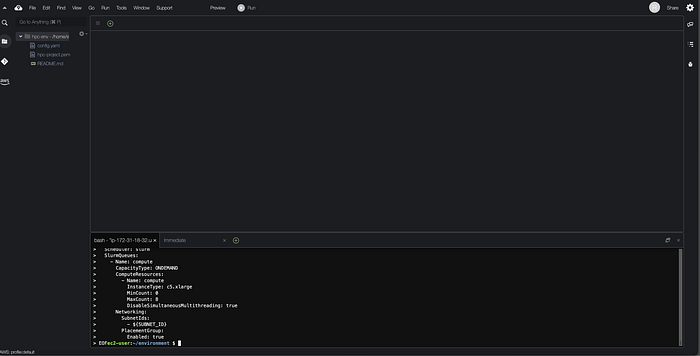
Build a Cluster:
No matter what method you used, you will end up with yaml config file to create the cluster.
Note:
As you can see from above, I always pick Slurm to be created with the cluster.
To build the cluster, run the below command in the cloud9 terminal
pcluster create-cluster --cluster-name hpc-cluster --cluster-configuration config.yaml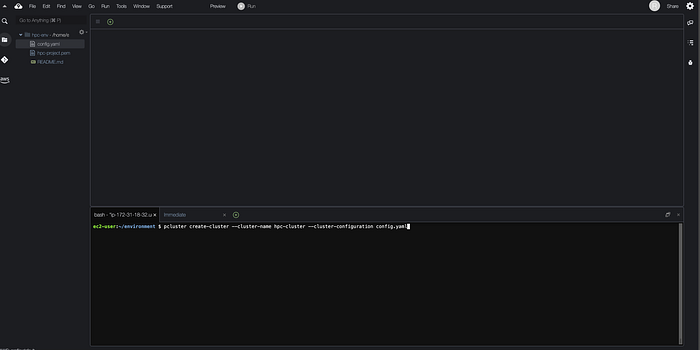
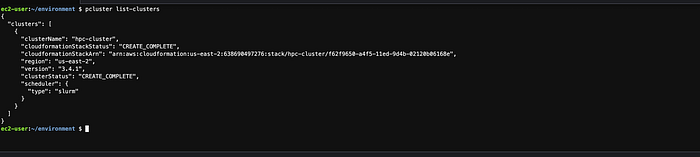
the cluster is currently in progress, to check the status, you can run this command
pcluster list-clustersOr go to the CloudFormation page to see the new cluster.
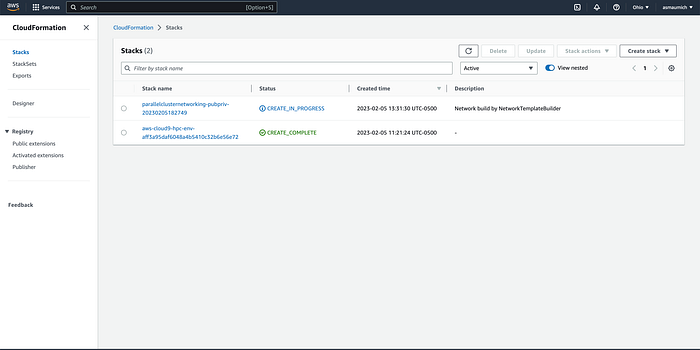
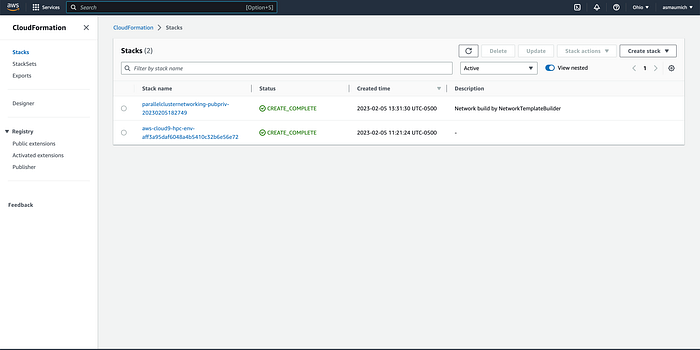
Once it shows that the clusterStatus is “CREATE_COMPLETE”, we are ready to log in to the cluster
Log in:
from the cloud9 terminal you can log in to the cluster head node by running
pcluster ssh --cluster-name hpc-cluster -i hpc-project.pemThe prompt will ask you “Are you sure you want to continue connecting?” write yes
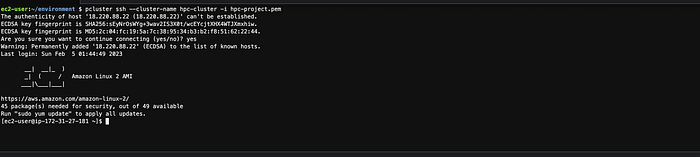
Now, you are logged in to your cluster head node!