Asma QuickStart guide: Working with CloudFormation for the first time

I was working on a CloudFormation task related to my work during the weekend and I thought to myself “Why not?” so here is the QuickStart guide for anyone working with CloudFormation for the first time. I won’t get deep into details.
The post will cover :
- What is CloudFormation?
- Create CloudFormation Stack
- Deploy CloudFormation Stack
- Update CloudFormation Stack
- Delete CloudFormation Stack
What is CloudFormation ?
It is one of AWS services, it basically helps us to define infrastructure as code then deploy, manage and delete in simple steps. CloudFormation made up of stacks, each stack consisting of one or more resources defined as code in a template file.
CloudFormation -> made of stacks, each stack -> made of a template
For writing templates, you can use either JSON or YAML.
Each CloudFormation template has 9 parts/sections, 8 of them are optional and one is mandatory, sections are:
- AWSTemaplateFormatVersion [optional]: AWS uses it to prove the template if in a future template format change. I think of it as AWS template versioning
- Description [optional]: description for template. Note, if you add it, it should come right after AWSTemplateFormatVersion
- Metadata [optional]: it has many uses such as specifying how information in the console will be shown when you deploy the template. Note, all of the resources in the template can use the data mentioned here.
- Parameters [optional]: we can configure variables so the template will ask the user to enter the value. Also, we can set a default value. For example, the size of the instance
- Mapping [optional]: I think of it as “Flag” values of template, for example, we can set environment types such as Dev, Staging, or Production, and based on environment type, we map certain resources to spin-off.
- Conditions [optional]: It is “IF” statements of template, based on number of values we set here, the template will know if we want to spin off certain resources or not
- Transform [optional]: it is used for serverless application
- Resources [Required]: it has logical AWS resource we want to create
- Outputs [optional]: if we want to get value/output after the stack is completely deployed, such as URL of the resource.
The stack will take logical resources we create in the Resources section and create physical resources in AWS
You can create a template with only the Resources section, but personally, I like to add AWSTemplateFormatVersion and Description sections as well.
Create CloudFormation Stack:
We will create S3 bucket to store images of our favorite bands. First, we will create a logical resource of type S3 and we can name it anything, for example, I will name my logical resource “Metallica” :)
Our CloudFormation template should be like this
AWSTemplateFormatVersion: "2010-09-09"Description:
  this template create S3 bucket for my fav bandResources:
  Metallica:
    Type: "AWS::S3::Bucket"
Note: logical name of a resource doesn’t reflect its physical name in AWS. So till this point, our S3 bucket name is not “Metallica”
Why would we not name physical resources?
It is recommended to let AWS CloudFormation do that for us instead of us hard-coded resources name, this way our template is reusable.
Deploy CloudFormation Stack:
To deploy CloudFormation template, you have a couple of options, I will demonstrate two of them which are: using AWS web console or AWS CLI.
AWS Web Console:
The simplest deployment option is using web console.
1- Log in to your AWS account
2- Search CloudFormation in the search bar and click on it
3- CloudFormation page will be open

4- Click on Create stack button at the top left corner (choose “with new resources” option)
5- Create stack page will show many options
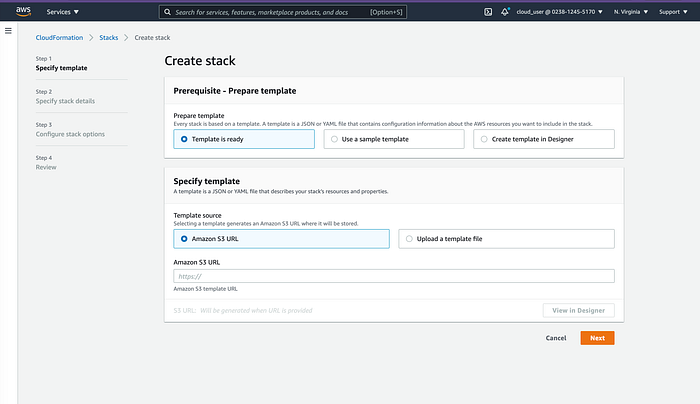
- Template is ready: we will choose this option as we already created a template file
- Use a sample template: AWS provides a couple of ready-to-use samples such as Ruby on Rails stack, WordPress blog stack ..etc
- Create template in Designer: AWS provides CloudFormation Designer service to graphically create your template
6- Choose “Template is ready”
7- Choose “Upload a template file” option and upload template file that we created
8- Click Next
9- Specify stack details page will open, enter a name for the stack. Note: your stack name should be unique, you cannot have two stacks projects with the same name
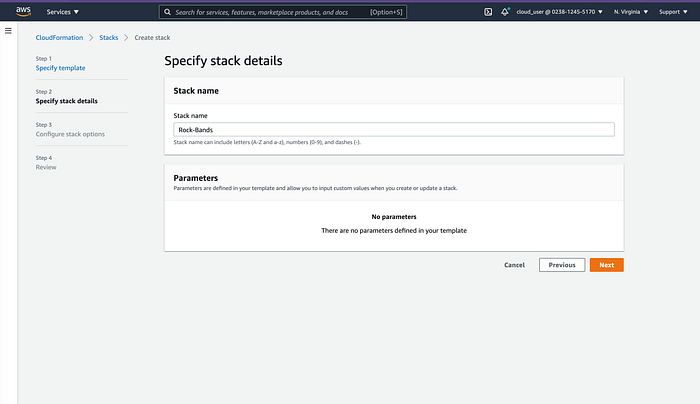
10- Configure stack options page will show, it has advanced settings for the stack, at this point, we don’t need to change anything, just click Next
11- Review page will show, click Create stack button
12- WAIT patiently
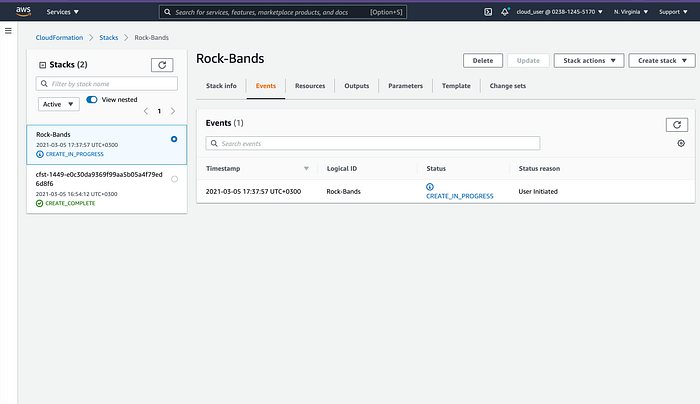
13- after a couple of seconds or minutes -depending on your template specification- your resource is created and ready

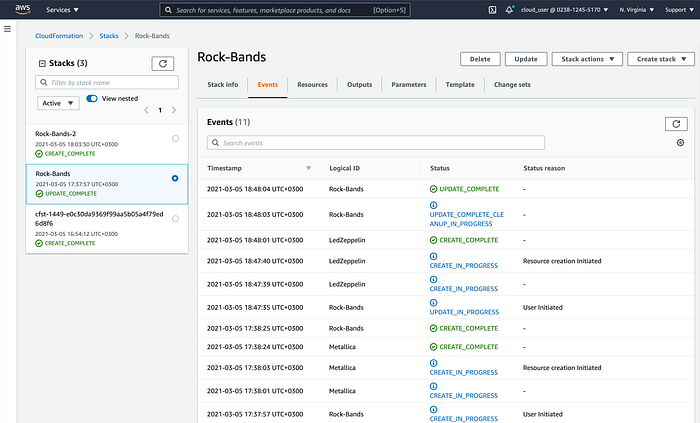
you can notice Logical ID column from the above image, if you want to check Physical ID, go to the Resources tab
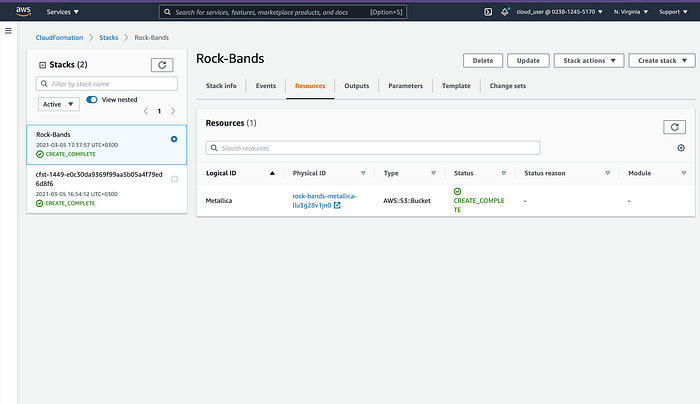
If you go to S3 buckets page, you will find our new S3 bucket
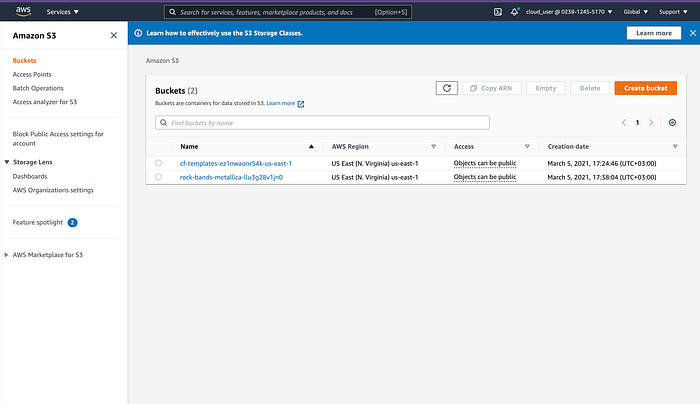
CloudFormation will use stack name-resource logical id-random string generated to create resource physical ID
AWS CLI:
prerequisites:
- you should have AWS CLI installed
- you should configure your AWS account, by running
aws configurethen enter your AWS Access Key ID and AWS Secret Access Key
All you have to do run the below command in a folder that has template.yaml. You can name your stack anything, I named mine “Rock-Bands-2”
aws cloudformation deploy --template-file template.yaml --stack-name Rock-Bands-2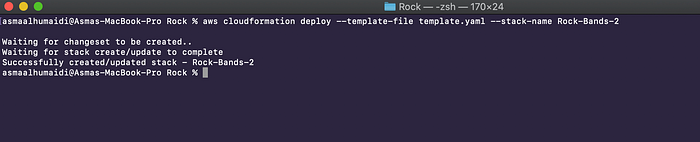
and Voila your stack is deployed and your resource is created
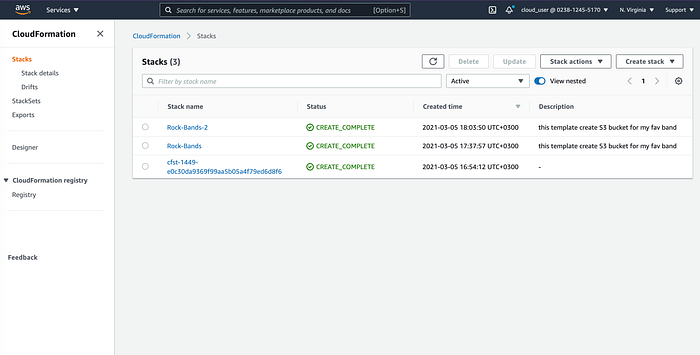
Update CloudFormation Stack
for the update, we have 3 cases, either we want:
- add new resource
- remove existing resource
- update existing resource configuration
Add New Resource:
adding a new resource is almost the same process as creating a new one, you need to modify the template file, then upload it. Here, I will create a new S3 bucket and name it “LedZeppelin”
AWSTemplateFormatVersion: "2010-09-09"Description:
  this template create S3 bucket for my fav bandResources:
  Metallica:
    Type: "AWS::S3::Bucket"

  LedZeppelin:
    Type: "AWS::S3::Bucket"
1- Go to CloudFormation page, choose the stack you want to update then click on Update button
2- update stack page will open, choose “Replace current template” option
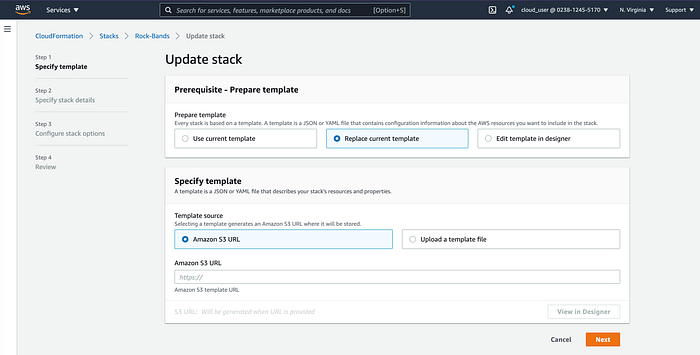
3- choose “Upload a template file” and upload file then click Next
4- Specify stack details page will open, click Next
5- Configure stack options page will open, click Next
6- Review page will open, go to the bottom of the page, you will see “Change set preview” double-check your change then click “Update stack” button
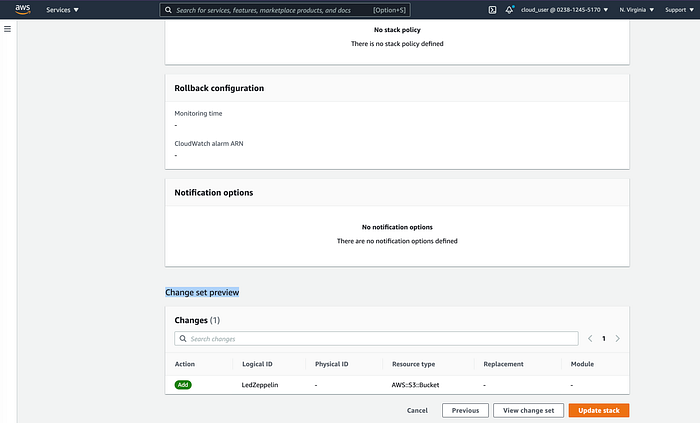
7- wait a little while AWS create the resource for you and update stack status
Remove Existing Resource:
You can remove any resource from your stack by simply edit template file and remove that resource then update CloudFormation. For example, I want to remove LedZeppelin resource, so template file will be like this
AWSTemplateFormatVersion: "2010-09-09"Description:
  this template create S3 bucket for my fav bandResources:
  Metallica:
    Type: "AWS::S3::Bucket"
update existing resource configuration:
To update an existing resource configuration, you need to modify it in the template then upload it as mentioned in Add New Resource section.
AWSTemplateFormatVersion: "2010-09-09"Description:
  this template create S3 bucket for my fav bandResources:
  Metallica:
    Type: "AWS::S3::Bucket"
    Properties:
      BucketName: MetallicaAlbumsLedZeppelin:
    Type: "AWS::S3::Bucket"
In the template above, I wanted to specify a physical name for the bucket resource instead of letting AWS generate that for me. We can do that by setting BucketName key. Now, we need to deploy the template as Add New Resource section.
Note: when we provide BucketName for already existed bucket resource, AWS CloudFormation will delete the old bucket completely and create a new one! so be careful
Delete CloudFormation Stack:
When you delete CloudFormation, it will delete all of its resources and configuration.
1-Choose stack to delete then click on the Delete button

2- pop-up confirmation will show, click on Delete stack button
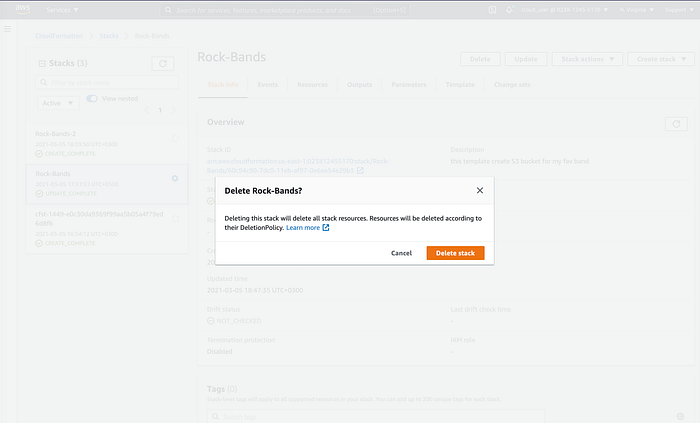
3- and wait. That’s it
Ok, that was my QuickStart guide for AWS CloudFormation. I hope it would help someone